Clearing CIFS Credentials on Windows 10
UPS shattering my main system and NAS led to a round of upgrades, including a round of operating system upgrades. Newer versions of FreeNAS don't quite exactly let you play fast and loose with Unix permissions on CIFS shares with quite the same effect as the good old days, so setting up proper Windows-style permissions is an important thing now.
Trying to test various users can be annoying without which you can easily kill the CIFS credentials you've entered and/or saved. Turns out, it is pretty easy to do that on Windows 10.
Clearing Out Saved Credentials
This step is necessary if you've instructed Windows to remember your credentials.
Open the Control Panel (Windows key, search control), hit up User Accounts, Credential Manager, Manage Windows Credentials. (Control Panel\User Accounts\Credential Manager)
Under the 'Windows Credentials' section, you should see your remote host listed. Click on it, select 'Remove'.
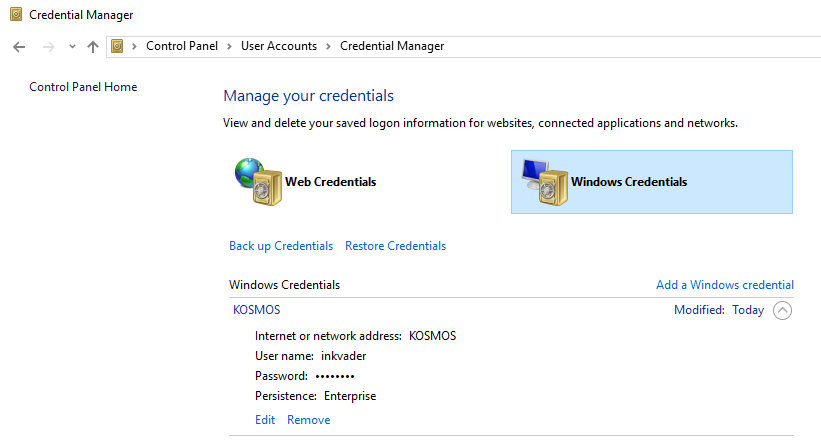
This takes care of the saved credentials, but you'll still need to clear out your active credentials - see the next section for that.
Clearing Out Active Credentials
Open up the Command Prompt (Windows key, search cmd) and execute the following:
net use * /d
This will clear out your active credentials. Next time you try to navigate to a share, you should be prompted to enter credentials.